Here is a collection of WX Series Wireless Access Controller Configs:
H3C WX Series AC + Fit AP Configuration Examples is organized as follows:
Here is a collection of WX Series Wireless Access Controller Configs:
H3C WX Series AC + Fit AP Configuration Examples is organized as follows:
A copy of the H3C Wireless Tech overview document helpful for a theory of operation on the WX series Wireless Access Controllers
I recently purchased a H3C Wireless Controller for the HP A7500 switch. One of the issues I found out was with the HP consolidation of the product lines from Colubris/3Com/H3C I couldn’t get a answer on what was supported. Here is a list of access points that should be supported:
JD446B – HP A-WA2110 Single Radio 802.11a/b/g Access Point
JD451A – HP A-WA2220 Dual Radio 802.11a/b/g Access Point
JD445A – HP A-WA2612 Single Radio 802.11n Access Point
JD472A – HP A-WA2620 Dual Radio 802.11n Access Point
JD452A – HP A-WA2610E Single Radio 802.11n Access Point
JD453A – HP A-WA2620E Dual Radio 802.11n Plenum Access Point
Ironically the following two are supported despite being some of the oldest and are not H3C. I anticipate these will soon be discontinued:
JD015A – HP A7760 Single Radio 802.11a/b/g Access Point
JD016A – HP A8760 Single Radio 802.11a/b/g Access Point
Discontinued but still should work:
3Com 3150
I am anticipating that some of the nicer E-Series Wireless will be supported hopefully the MSM317 would be sweet.
There are hidden commands only to be used by developers within the H3C interface:
The command to access this view is: _hidecmd
Which gives you the following warning:
Now you enter a hidden command view for developer’s testing, some commands may
affect operation by wrong use, please carefully use it with our engineer’s
direction.
Depending on your device it will unlock different options :
On the 7500 Switch:
_bgp_display_debuginfo_detail Cancel current setting
_debugging Specify the slot number
_device Display device information
_display Display current system information
_exp_memfail_malloc Display current system information
_fib Specify FIB configuration information
_igmp-static-group Generate many group membership protocol
specific static-group routes
_ip-check-source IP
_memory Memory operations
_mld-static-group Generate many group membership protocol
specific static-group routes
_remove Display device program debugging
information
_reset Reset operation
_terminal Settings of terminal
_test Test trap send
_write Write register
On the 7500 Wireless Access Controller:
_debugging Display device program debugging information
_display Display current system information
_fib Specify FIB configuration information
_memory Memory operations
_reset Reset operation
_terminal Settings of terminal
_test Test trap send
_write Write register
On the 5500-SI Switch:
_debugging Display device program debugging information
_display Display driver modules information
_fib Specify FIB configuration information
_memory Memory operations
_reset Reset operation
_terminal Settings of terminal
_test Test trap send
_write Write register
Since I couldn’t find a quick comprehensive feature code list for the 3Com VCX phone system I’m posting the one I use.
| Code | Description |
Code |
Description | |
| 100 | HANDS_FREE_BTN |
341 |
USE_COMPRESSED_BTN | |
| 101 | MUTE_BTN |
342 |
USE_729B_BTN | |
| 102 | VOLUME_UP_BTN |
343 |
USE_SUBNET_OPT_BTN | |
| 103 | VOLUME_DOWN_BTN |
344 |
DIAL_BY_URL_BTN | |
| 104 | SPEAKER_BTN |
347 |
TOGGLE_TONES_BTN | |
| 105 | SOFT1_BTN |
348 |
TOGGLE_FONT_SIZE_BTN | |
| 106 | SOFT2_BTN |
349 |
TOGGLE_LANGUAGE_BTN | |
| 107 | SOFT3_BTN |
350 |
DISPLAY_EXTENSION_BTN | |
| 108 | LCD_UP_BTN |
351 |
TOGGLE_STRINGS_BTN | |
| 109 | LCD_DOWN_BTN |
352 |
DISPLAY_VLAN_BTN | |
| 110 | FEATURE_BTN |
400 |
CFWD_BTN | |
| 111 | CANCEL_BTN |
401 |
REDIAL_BTN | |
| 112 | HEADSETSEL_BTN |
410 |
PROGRAM_BTN | |
| 119 | MALICIOUS_CALL_TRACE_BTN |
420 |
TRANSFER_BTN | |
| 122 | OK_BTN |
425 |
SILENT_MONITOR_BTN | |
| 125 | ALPHA_NUM_BTN |
428 |
BARGE_IN_BTN | |
| 126 | SPD_CALL_BTN |
429 |
BLOCK_BARGE_IN_BTN | |
| 128 | TOGGLE_LOGIN_BTN |
430 |
CONFERENCE_BTN | |
| 129 | GLOBAL_DIRECTORY_BTN |
433 |
ENTER_COS_BTN | |
| 154 | LCD_LEFT_BTN |
434 |
USER_PASSWORD_BTN | |
| 155 | LCD_RIGHT_BTN |
440 |
FWD_MAIL_BTN | |
| 301 | STATUS_1_BTN |
441 |
TRANSFER_VMAIL_BTN | |
| 302 | STATUS_2_BTN |
444 |
PARK_BTN | |
| 303 | STATUS_3_BTN |
446 |
DND_BTN | |
| 304 | STATUS_4_BTN |
455 |
DIRECTED_PICKUP_BTN | |
| 305 | STATUS_5_BTN |
456 |
GROUP_PICKUP_BTN | |
| 306 | STATUS_6_BTN |
460 |
DIRECTORY_BTN | |
| 307 | STATUS_7_BTN |
461 |
LOCAL_DIRECTORY_BTN | |
| 308 | STATUS_8_BTN |
462 |
HISTORY_BTN | |
| 309 | STATUS_9_BTN |
463 |
PER_SPEEDDIAL_BTN | |
| 320 | DISPLAY_IP_BTN |
464 |
SYS_SPEEDIDAL_BTN | |
| 321 | DISPLAY_GATEWAY_IP_BTN |
465 |
FWDU_BTN | |
| 322 | DISPLAY_SUBNET_MASK_BTN |
466 |
FWDRNA_BTN | |
| 323 | DISPLAY_NCP_IP_BTN |
467 |
FWDB_BTN | |
| 324 | DISPLAY_NCP_2_IP_BTN |
468 |
REMOTE_FWDU_BTN | |
| 325 | DISPLAY_CUR_PBX_IP_BTN |
469 |
SERVER_CAMPON_BTN | |
| 326 | DISPLAY_SIP_GW_INFO_BTN |
471 |
SERIAL_CALLING_BTN | |
| 327 | DSIPALY_SUBJECT_BTN |
489 |
RINGER_MUTE_BTN | |
| 328 | CAMPON_BTN |
600 |
MSG_BTN | |
| 329 | DTMF_VOLUME_BTN |
601 |
SPD_1_BTN | |
| 331 | SEND_BEEP_BTN |
668 |
ONE_WAY_AUTO_ANSWER_BTN | |
| 332 | TOGGLE_WARNING_TONE_BTN |
669 |
TWO_WAY_AUTO_ANSWER_BTN | |
| 333 | RESET_DEFAULTS_BTNS |
700 |
SSPD_1_BTN | |
| 335 | RE_REGISTER_BTN |
751 |
TOGGLE_BTN | |
| 336 | RESTART_PHONE_BTN |
837 |
VERSION_INFO_BTN | |
| 337 | RESET_PHONE_BTN |
889 |
TOGGLE_CID_ALL_BTN | |
| 338 | DEBUG_INFO_BTN |
890 |
TOGGLE_CID_PERCALL_BTN | |
| 339 | TOGGLE_ASSERT_BTN |
971 |
HUNT_GROUP_LOGIN_BTN | |
| 340 | USE_2OMS_BTN |
972 |
VIEW_HUNT_GROUP_BTN | |
This assumes your using the default passwords
Start Cygwin
At the $ prompt type startx

This will open a new window in that window type: ssh –Y app@”ip of your messaging server“
At the password prompt enter: nice
I recommend performing the following steps as root so type: su
And the password is: pvadmin
Type the following command replacing the printer name you would like to use and the ip address of the printer: /usr/sbin/lpadmin -p myPrinter -v lpd://10.1.1.1/lp -m postscript
Then to enable the queue type: /usr/bin/enable myPrinter
Then to allow it to accept print jobs type: /usr/sbin/accept myPrinter

This will show if the print queue has been created correctly.
Into the blue GUI
Exit out of superuser mode type: exit
Type: vmlogin &
The username is root
The password is secret


Click Company

Click the bottom Unassigned:

Select the printer you just created in the Avail Prnt drop down.

Assign the printer by typing y
Click Exit and Exit again to get to the main menu.

Click Subscriber profile

Type the mailbox number you are using for a fax machine.2555

Under the fax mailbox you are looking to enable to print faxes from click Delv
Select Fax Autodelivery and choose the printer name.

I have been using 5412ZL HP Procurve switches for some time and recently noticed an alarming issue in my config. If I mistakingly logged into the switch multiple times and did not close them out properly I would be greeted with the following message:

If I had access to the console port that might be something but this switch was located offsite in a locked room.
First snmpwalk the tcpConnState, the example below is for a community name “private”, version 1 snmp ” -v 1 “, ip address “1.1.1.1”, and the OID of “tcpConnState” :
snmpwalk -c private -v 1 1.1.1.1 tcpConnState
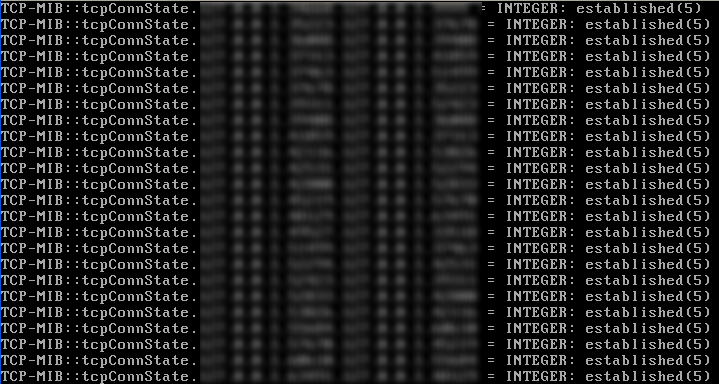
this will return all the connections listening or active, the troublesome ones should be at the end in the form with the switchport equal to 23 in the format tcpConnState.switchip.switchport.telnetclientip.telnetclientport
run the following command to kill each connection
snmpset -c private -v 1 1.1.1.1 tcpConnState.1.1.1.1.23.clientip.clientport i deleteTCB
Hope this helps…
At my place of business we use alot of MS Terminal Services 2003 coupled with a commercial linux distro that runs rDesktop called 2x. Alot of our ends users specifically needed to take pictures with their digital camera and upload them to the server(the camera is configured to display as a usb disk drive). This was working fairly well up until recently when all of a sudden the user would go to access the camera as a RDP redirected drive and it would wait and wait and wait about 30 seconds then show you the folder and it was the same for each click into a sub folder on the drive. We tried everything uninstall antivirus, different service packs, different client(including a custom linux distro I built years ago with thinstation.org), no luck.
So I worked on something else for a week, to be honest I thought: Wow, what a weird issue hope somebody else has seen it and written something up. I came back to it today and thought it had to be failing out somewhere on what I assumed to be a file type access so I ran filemon utility from Microsoft. To be honest never run this utility on a box that is in production it generates alot of crap I mean output. Sure enough within two minutes I figured out the issue, and why it came up just recently. The explorer process was trying to access a network share called \\tsclient\hotplug (this is what usb drives are redirected under from linux) and getting back a “path not found” error. While I have seen the explorer bar read \\tsclient\C numbers of times on redirected drives I never gave it much thought. I thought it was a Microsoft cute way of integrating the RDP into the explorer. Well in a normal network this works fine the system puts a request out to DNS/hosts/WINS and fails out nearly instantly, and then some peice of code must then point the name to the server itself. Our systems were resolving tsclient to an actual IP via the DNS upstream provider we started using OPENDNS. OPENDNS has a couple of nice features our ISP doesn’t provide DNS STATS, DNS Blacklisting, Typo correction, and guided search so if a user types a incorrect web address it will try and correct or bring you to a search page with that as a search keyword. The way this works is for unresolvable names it returns the IP address of OPENDNS server and your webbrowser goes to their servers and they serve up a search page using the host header you requested. So on our terminal server when our users would click into the \\tsclient\hotplug , the system would resolve the name tsclient and it receive a IP to OPENDNS servers that would then need to failout, and then go about its normal rendering of the tsclient shares. The best solution I figured out was to create a DNS entry for “tsclient ” on our internal DNS servers and have it resolve to 127.0.0.1. This solved the speed issue instantly.
Hope this helps someone else!
As I have worked with Sharepoint project I tried to ensure one thing: that a user should be able to customize and update any image, text, etc from within the browser easily. Well, What isn’t available for editing in the browser pretty much nothing. But do you want a end user updating something in a master page. For example if you created a footer globally in a master page and applied it across all sites do you want a end user coming in and trying to edit the one page that can break the entire site? Answer add a web part to a master page specifically a dataview webpart like in http://meyerssoft.com/2009/05/09/adding-customized-webparts-to-masterpage/ . By linking this to a list it will allow a end user to update using the Sharepoint list item. To begin create a custom list by going to Site Actions -> Create and choosing Custom List call it Footer. Once that is done create
a column called Body

Now create a new list item:

Now comes the interesting part open up Sharepoint Designer (the best free CMS designing tool I’ve found) and open your master page.
Find the very bottom of your page I recommend following the table tags for instance the ms-main table add the following after the last </TR> tag:
<tr><td><div class=”footer”>TEST</div></td></tr>

Now we can insert the data view web part click in the table row where the word test appears: Insert->Sharepoint Controls->Data View. This will open the data sources library pane to the right hand right of the screen. Right click the footer list to the right and select Show Data. Drag the Body row into the web part. It should look like this:

Now right click the left hand side where is says Body choose Delete->Delete Columns. This should should make your footer text the only column shown. Go into the code view windows and got the following line <xsl:value-of select=”@Body” disable-output-escaping=”yes” /></td> and delete the class and width tag above this line in the TD tag. Select the body area and right click and choose Format Item as->Rich Text. The last thing is to add a peice of code to ensure the webpart displays properly on subsites:
<WebPartPages:DataFormParameter ParameterKey=”WebURL” PropertyName=”ParameterValues” DefaultValue=”/” Name=”WebURL”></WebPartPages:DataFormParameter>
This needs to be added before each of the following:
</SelectParameters>
</DeleteParameters>
</UpdateParameters>
</InsertParameters>
and delete the word test we added in the beginning,
You should be able to save andhave something that looks like this, remember that it can be completely stylized with the footer CSS tag:

In case you have never seen this article for creating a list of members dataview of a Active Directory group I highly recommend it http://www.sharepointblogs.com/wsspectacular/archive/2008/01/10/how-to-display-an-ad-group-in-a-sharepoint-dataview.aspx. I found this very useful for creating staff directory under different departmental pages in our organization. You can perform it by creating a SQL view for each department, and displaying it as a data view. This also puts the requirement on those departments to update the IT dept in case of changes, normally departments notice something is wrong within the website before they ever open an Outlook Distribution/Security Group to check the members. Also in case your organization is lacking information this can be used as a driving factor to ensure accurate information within AD.
